Docker Apps
Bookstack
Bookstack installation
Change port to 6975
Add in docker-compose: restart: unless-stopped
$docker directory = /home/docker .... etc
Docker-Compose file reference
https://github.com/solidnerd/docker-bookstack/blob/master/docker-compose.yml
version: '2'
services:
  mysql:
    image: mysql:8.0
    environment:
    - MYSQL_ROOT_PASSWORD=secret
    - MYSQL_DATABASE=bookstack
    - MYSQL_USER=bookstack
    - MYSQL_PASSWORD=secret
    volumes:
    - mysql-data:/var/lib/mysql
    restart: unless-stopped

  bookstack:
    image: solidnerd/bookstack:22.10.2
    depends_on:
    - mysql
    environment:
    - DB_HOST=mysql:3306
    - DB_DATABASE=bookstack
    - DB_USERNAME=bookstack
    - DB_PASSWORD=secret
    #set the APP_ to the URL of bookstack without without a trailing slash APP_URL=https://example.com
    - APP_URL=http://xxx.xxxmydomainxxx.duckdns.org
    volumes:
    - $docker/public-uploads:/var/www/bookstack/public/uploads
    - $docker/storage-uploads:/var/www/bookstack/storage/uploads
    ports:
    - "6975:8080"
    restart: unless-stopped
Notice: The default password for bookstack is
password
Permissions: remember the set write permission on public-uploads folder so users can upload photos.
Backup and Restore
Files Backup:
tar -czvf bookstack-files-backup.tar.gz public-uploads storage-uploadsRestore:
tar -xvzf bookstack-files-backup.tar.gzDatabase backup:
sudo docker exec bookstack_mysql_1 /usr/bin/mysqldump -u root --password=secret bookstack > ./bookstack/bookstack_db.sqlRestore:
sudo docker exec -i bookstack_mysql_1 mysql -u root --password=secret bookstack < /$docker/bookstack/bookstack_db.sql- bookstack_mysql1 is the container name
- password is secret or the database password
Reverse Proxy
Use subdomain in proxy manager.
Backing Up and Restoring with LinuxServer.io container
Due to limits or Oracle Cloud free tier. The only arm image is from linuxserver io container, and it is different than solidnerd image.
Docker-Compose file
version: "2"
services:
  bookstack:
    image: lscr.io/linuxserver/bookstack
    container_name: bookstack
    environment:
      - PUID=1001
      - PGID=1001
      - APP_URL=https://wiki.xxx.duckdns.org
      - DB_HOST=bookstack_db
      - DB_USER=bookstack
      - DB_PASS=secret
      - DB_DATABASE=bookstackapp
    volumes:
      - /home/ubuntu/bookstack:/config
    ports:
      - 6975:80
    restart: unless-stopped
    depends_on:
      - bookstack_db

  bookstack_db:
    image: lscr.io/linuxserver/mariadb
    container_name: bookstack_db
    environment:
      - PUID=1001
      - PGID=1001
      - MYSQL_ROOT_PASSWORD=secret
      - TZ=Europe/London
      - MYSQL_DATABASE=bookstackapp
      - MYSQL_USER=bookstack
      - MYSQL_PASSWORD=secret
    volumes:
      - /home/ubuntu/bookstack:/config
    restart: unless-stopped
Notice: In Oracle cloud free tier, the default ubuntu user is 1001, not 1000. For database name, it it bookstackapp, keep in mind when executing restore command. The folder structure is also different. In the solidnerd container, the images are stored at /public-uploads while in LSIO container it is stored at /www/uploads
Backing Up (from home PC)
Images
cd into /public-uploads and make a tar archive
tar -czvf images.tar.gz imagesBackup the database
sudo docker exec bookstack_mysql_1 /usr/bin/mysqldump -u root --password=secret bookstack > ./bookstack_db.sqlTransfer to Oracle Cloud Server
scp -i oracle-arm-2.key images.tar.gz bookstack_db.sql ubuntu@$IPADDR:/home/ubuntu/bookstack/www/uploadsTake in consideration the location where LSIO image stores the images.
Restore (into Oracle Cloud)
Images (/home/ubuntu/bookstack/www/uploads)
tar -xvzf images.tar.gzDatabase
The image url in the database still refers to old server url, it needs to be changed. The following command replace the subdomain in the sq1 dump.
sed -i 's/wiki.$home.duckdns.org/wiki.$oracle.duckdns.org/g' bookstack_db.sqlRestore the database.
sudo docker exec -i bookstack_db mysql -u root --password=secret bookstackapp < /home/ubuntu/bookstack/www/uploads/bookstack_db.sqlCrontab
On Home PC
0 23 * * 2,5 /home/karis/bookstack.sh#!/bin/bash
cd ~/docker/bookstack/public-uploads #location of bookstack public uploads
tar -czvf images.tar.gz images
sudo docker exec bookstack_mysql_1 /usr/bin/mysqldump -u root --password=secret bookstack > ./bookstack_db.sql
scp -i oracle-arm-2.key images.tar.gz bookstack_db.sql ubuntu@$ORACLEIP:/home/ubuntu/bookstack/www/uploadsMake sure to copy the oracle-arm-2.key to the appropriate location (~/docker/bookstack/public-uploads)
Also make sure the permission of oracle-arm-2.key is in correct permission (600). Especially changing the permission of public-uploads folder to allow write access.
Do a backup sequence in crontab at 11pm every Tuesday and Friday.
Oracle Cloud Server
0 8 * * 3,6 /home/ubuntu/bookstack.sh#!/bin/bash
cd ~/bookstack/www/uploads #directory where bookstack files scp from home are located
tar -xvzf images.tar.gz
sed -i 's/wiki.$homeip.duckdns.org/wiki.$oracle.duckdns.org/g' bookstack_db.sql
sudo docker exec -i bookstack_db mysql -u root --password=secret bookstackapp < /home/ubuntu/bookstack/www/uploads/bookstack_db.sqlRestore the sequence after backup, every Wednesday and Saturday at 8am (need to consider the TZ between Vancouver, Edmonton and Toronto, or any the time zone of the remote server)
Media Apps
Rich Media
Hello Everyone
This is a demo consisting of medias.

Some Code
docker-compose up -dimport os
import time
print("hello world")
if a=b:
print(a)
elif b=c:
try:
print(c)
except:
print(c+a)
else:
print("what is the meaning of life")More sample media

Portainer is a software for managing docker containers.
Audiobookshelf
Audiobooks and podcasts.
Docker-compose, place it in the media apps compose media.yml
version: "3.7"
services:
  audiobookshelf:
    image: ghcr.io/advplyr/audiobookshelf:latest
    environment:
      - AUDIOBOOKSHELF_UID=99
      - AUDIOBOOKSHELF_GID=100
    ports:
      - 13378:80
    volumes:
      - /mnt/m/Audios/audiobooks:/audiobooks # hard drive mount
      - /mnt/m/Audios/podcasts:/podcasts # hard drive mount
      - $HOME/audiobookshelf/config:/config
      - $HOME/audiobookshelf/metadata:/metadata
    restart: unless-stopped
Using the software
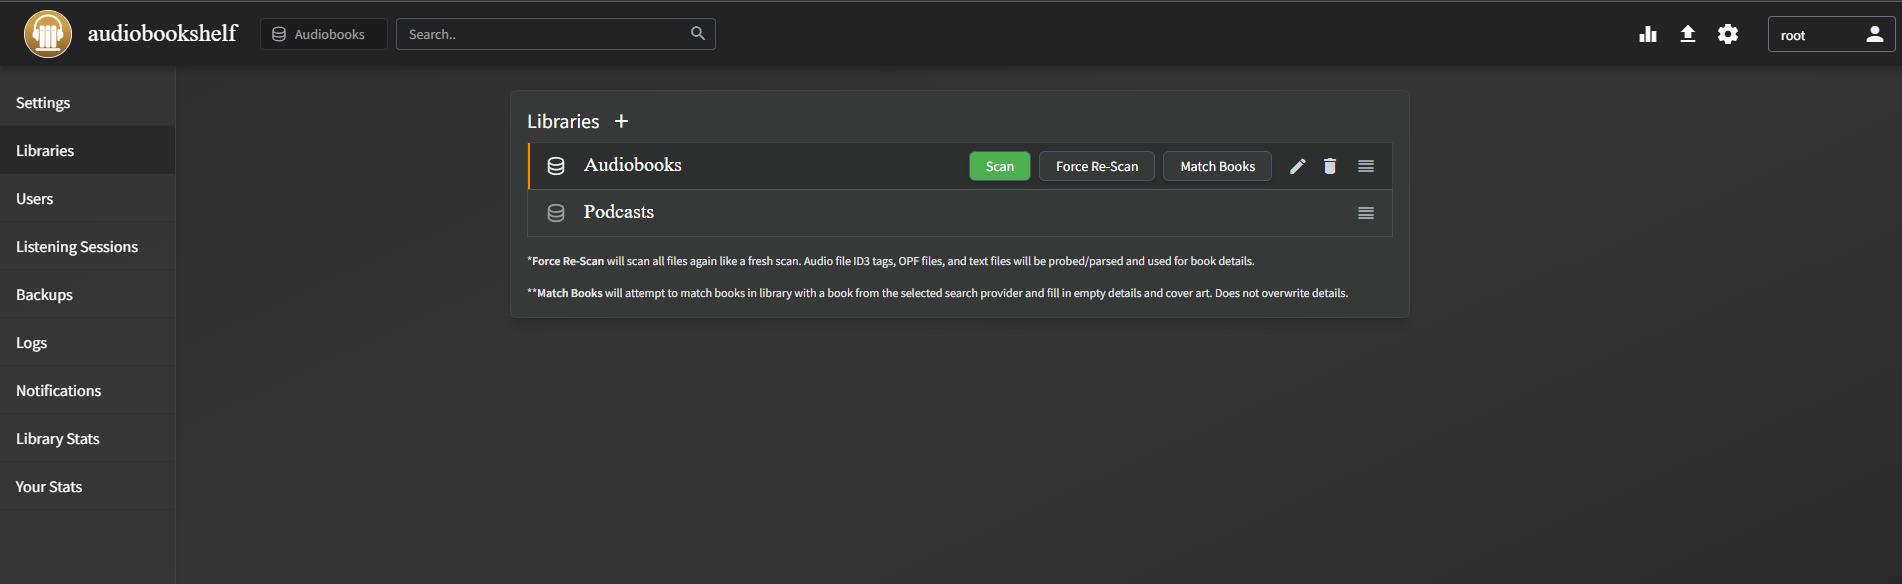
To add a library, go to settings, libraries and add the path as mounted in docker.
Go to Users, change the root password and create a new user. Note, the user cannot scan library, only the root can do that.
Adding Media
Make sure the contents are in a separate folder. Follow naming like this. A cover image can also be created. The best bitrate should be under 128 kbps for smooth playback.
/audiobooks
--- ./Author - Book
---  --- ./cover.jpg
---  --- ./book - 001 or book - chapter 1
---  --- ./book - 002
---  --- ./book - 003
In the WebUI, make sure logged in as root. Go to settings, library and scan. It will scan the newly added media.
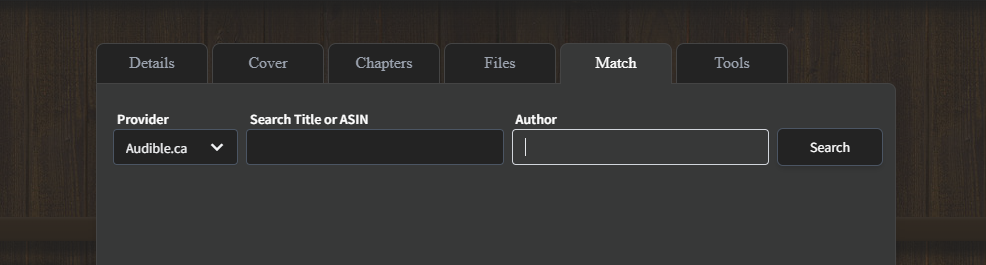
If the media does not match or not have an image, go click the edit icon, go to Match, the best result is usually Audible.ca.
If the chapter does not match, chapters can be edited manually. Go to Chapter and Lookup.
Mobile App
https://play.google.com/store/apps/details?id=com.audiobookshelf.app
Mobile app also has download functionality, however, the directory cannot be changed, the default for download is /Internal Storage/Download/{Podcast or Audiobook}
The statistic of minutes listened is the actual minutes listened, not the minutes of audiobook progress listened (eg. playing at faster speed).
Scripting (Windows)
ffmpeg detect audio silence (for splitting a large audio file into multiple chapters)
ffmpeg -i input.mp3 -af silencedetect=n=-50dB:d=1.5 -f null -ffmpeg -i input.mp3 -af silencedetect=n=-50dB:d=1.5 -f null -loglevel debug 2>&1 - | findstr "silence_duration" | find /c /v ""This will find silence parts below -50dB and duration threshold of 1.5s.
The second code (windows cmd only) for linux use grep -c, finds how many silence parts can be detected, this should correlate to number of chapters.
Once the optimal duration is set, use split.py.
ffmpeg that remove silence from audio
ffmpeg -i input.mp4 -af silenceremove=stop_periods=-1:stop_duration=4:stop_threshold=-50dB -b:a 96k output.mp3- stop_duration (threshold duration for removing silence part)
- stop_periods = -1 (search for the entire audio track)
Use edge_reader.py to utilize Edge AI reader to read the audiobook if only the pdf book is provided.
After reading, put all the recorded files and pdf in the project folder and run processing.py twice.
Free Games Claimer
https://github.com/vogler/free-games-claimer
This is the Github repo for the new and advanced free games claimer. This is implemented after Epicgames FreeGames keeps failing.
Configuration
Using Docker-Compose
In the folder structure
server: ~/docker/fgc$
docker-compose.yml
fgc.env
fgc.env is the environment file for all the password/keys to login to different game services, fill it in manually or use a backup.
EG_OTPKEY=
EG_EMAIL=
EG_PASSWORD=
NOTIFY=discord://123456/ABCD
PG_EMAIL=
PG_PASSWORD=
GOG_EMAIL=
GOG_PASSWORD=
TIMEOUT=300
NOTIFY=discord://123456/ABCD if the webhook looks like this https://discord.com/api/webhooks/123456/ABCD
TIMEOUT=300 sets the timeout to 300s before the container skip and error out due to EpicGames captcha problems. However, the impact on prime gaming and GOG are not tested.
docker-compose.yml
services:
  free-games-claimer:
    container_name: FGC # is printed in front of every output line
    image: ghcr.io/vogler/free-games-claimer # otherwise image name will be free-games-claimer-free-games-claimer
    build: .
    ports:
      - "5990:5900" # VNC server
      - "5890:6080" # noVNC (browser-based VNC client)
    volumes:
      - ~/docker/fgc:/fgc/data
      - ~/docker/fgc/epic-games.js:/fgc/epic-games.js
      - ~/docker/fgc/prime-gaming.js:/fgc/prime-gaming.js
      - ~/docker/fgc/gog.js:/fgc/gog.js
    command: bash -c "node epic-games; node prime-gaming; node gog; echo sleeping; sleep 1d"
    env_file:
      - fgc.env
    restart: unless-stopped
This docker-compose file use the environment file fgc.env as indicated above and runs once every day. It also contains VNC server/web based client.
Missing Captcha Session
This should no longer be needed. Edit the line to epicgames.js code and replace with the following message. When the captcha is missed, it will send a notification for manual claiming.
await notify(`epic-games: got captcha challenge right before claim. Use VNC to solve it manually. Game link: \n ${url}`)EpicGames require a captcha to claim free games. If the 5 minute timeout window for EpicGames is missed, it is no longer possible to claim the games unless waiting for the next day, which due to the nature of discord notifications, there is a slim to none chance of catching the captcha at next day. To continuing claiming after acknowledging the missed session, use portainer, ConnectBot Android to temporarily restart the container to restore VNC session.
In order to restore the default time of claiming the games. Eg. waking up on Thurs or Fri and a predictable time and claim games, use the linux at command.
at 9:20
> docker restart FGC
> <EOT>
This will run the command at 9:20 AM the next day. Ctrl-D to exit at prompt and verify the time is correct.
jlesage VNC Apps
VNC apps consists of desktop applications that have the GUI in a web browser, mostly from the creator jlesage.
At least for apps from jlesage, it supports an environment variable. Create an environment file called vnc.env
The environment file can be reference in many docker images from jlesage using docker-compose. The current environment variable specify U/GID, time zone and make every app dark mode. It is also possible to set VNC passwords. This is the full list of environment variables.
USER_ID=1000
GROUP_ID=1000
TZ=America/Vancouver
DARK_MODE=1
The jlesage apps have 2 ports, port 5800 for viewing the VNC app on a web browser on desktop; port 5900 is for VNC protocol that can be used in dedicated VNC viewer or mobile viewing.
General Bind Mounts
The appdata bind mount is located in the ~/docker/vnc, as seen from the yml example, the vnc environment file vnc.env is placed in the appdata folder. For application requiring access to movie storage, the bind mount is on the corresponding hard drive or pool. As for applications requiring access to storage but not large media, it's best to put the files on a SSD.
This is an example of VNC container of MKVToolNix. The vnc.yml file is backed up elsewhere.
    mkvtoolnix:
        image: jlesage/mkvtoolnix
        env_file:
            - ./vnc/vnc.env
        volumes:
            - '/mnt/data/nzbget:/storage:rw'
            - '~/docker/vnc/mkvtoolnix:/config:rw'
        ports:
            - '5820:5800'
            - '5920:5900'
        container_name: mkvtoolnix
Application Port Procedure
The application port start from 5800/5900 for its corresponding access and add 10 for each application.
JDownloader: 5800
Firefox: 5810
MKVToolNix: 5820
MKVCleaver: 5840
MegaBasterd: 5860 (no VNC viewer 59xx port)
There are also some application specific setup. For applications accessing hard drive or intensive apps, it is best to stop when not used. Lazytainer and ContainerNursery and possibly using DNS server can help automate this process.
JDownloader
Tesla Homepage
This is a homepage that allows Tesla browser to enter full screen mode.
Docker-compose
services:
  homepage-for-tesla:
    image: jessewebdotcom/homepage-for-tesla:latest
    container_name: homepage-for-tesla
    environment:
      - DEFAULT_THEME=13
    volumes:
      - ~/docker/tesla/public/bookmarks.json:/app/public/bookmarks.json
      - ~/docker/tesla/public/images:/app/public/images
    ports:
      - "3000:3000"
Minecraft
This chapter is about Minecraft setup in Docker server.
Minecraft Prep and Install
Client Setup (Java + Online)
- Download Java
- Download OptiFine the latest version.
- On the official Minecraft client, go add a new installation and match the version with OptiFine.
- Download and try the official version, then install OptiFine with Java.
- Under Settings -> Keep the Launcher open while games are running
Client Setup (Java + Offline)
- Use the client PolyMC to enable offline play.
- Go to the right corner, manage accounts and create an offline account.
- Click on add an instance and follow the guide.
- To install OptiFine, need the official launcher first, then download OptiFine
- Extract OptiFine, the extracted file should be ending in _MOD.jar
- Open the jar file in WinRAR, then move the files from notch folder into the base folder. Save the jar archive.

- Go to PolyMC, right click on the instance, click Edit -> Versions -> Add to minecraft.jar and select the modified OptiFine.

Docker Server Setup
Docker-compose for minecraft server
version: "3.9"
services:
  minecraft:
    image: marctv/minecraft-papermc-server:latest
    restart: unless-stopped
    container_name: mcserver
    environment:
      - MEMORYSIZE=4G
      - PAPERMC_FLAGS=""
      - PUID=1000
      - PGID=1000
    volumes:
      - ~/docker/minecraft:/data:rw
    ports:
      - 25565:25565
      - 19132:19132
    stdin_open: true
    tty: true
This downloads the latest version of Minecraft, to use another PaperMC version, need to build the image from scratch.
Warning: PaperMC cannot be downgraded, only newerversion of PaperMC can be installed after first run.
git clone https://github.com/mtoensing/Docker-Minecraft-PaperMC-Server
# go edit the "ARG version=1.xx.x" to the correct version
docker build -t marctv/mcserver:1.xx.x
Folders and Plugins
Plugins are located in folder ./plugins some plugins have .yml files. To update or download plugins, use scp, wget on the server or VSCode.
The world folder consists of the save data. It is separated into world, nether, the_end.
Before starting the server, the eula.txt must have eula=true.
bukkit and spigot.yml in the root folder are configuration files for PaperMC.
Rcon Commands
To access the rcon-cli, use docker attach mcserver, to exit, use Ctrl-P and Q, if using VSCode may need to edit keyboard shortcut.
Editing VSCode Shortcut
Press Ctrl-Shift-P and search for keyboard shortcut json.
[
    {
        "key": "ctrl+p",
        "command": "ctrl+p",
        "when": "terminalFocus"
    },

    {
        "key": "ctrl+q",
        "command": "ctrl+q",
        "when": "terminalFocus"
    },

    {
        "key": "ctrl+e",
        "command": "ctrl+e",
        "when": "terminalFocus"
    }

]Useful Plugins
ViaVersions - allow other similar version to join the server without conflict
Offline Mode/Mobile Bedrock
To allow offline play for PC version. Change server.properties and edit these lines
enforce-whitelist=false
online-mode=false
Refer to Minecraft Prep and Install to install offline client.
For bedrock compatibility, need the geyser plugin.
To allows offline play for bedrock mobile version. Go to ./plugins/Geyser-Spigot/config.yml and change these lines. Do not install the plugin floodgate, if it's installed, removed the plugin. ViaVersions is also needed for mobile play.
auth-type: offline
enable-proxy-connections: true
Now client can play without login to Xbox or Java.
Filebrowser
Filebrowser app on a webbrowser, port 4455.
Docker-compose deployment
version: '3.9'
services:
    filebrowser:
        container_name: filebrowser
        image: filebrowser/filebrowser
        ports:
            - '4455:80'
        user: 1000:1000
        restart: unless-stopped
        volumes:
            - '~/docker/filebrowser/.filebrowser.json:/.filebrowser.json'
            - '~/docker/filebrowser/filebrowser.db:/database.db'
            - '~/docker/filebrowser/branding:/branding'
            - '~/docker:/srv/docker'
            - '/mnt/data:/srv/data'
            - '/mnt/nvme/share:/srv/nvme-share'
The first 3 bind mount are for configuration of filebrowser, eg. config, database and branding files. On first deployment, need to create an empty database.db file. The remaining bind mount are for the folders that need to be accessed, the folders should be bound under /srv.
This is the content of .filebrowser.json
{
    "port": 80,
    "baseURL": "",
    "address": "",
    "log": "stdout",
    "database": "/database.db",
    "root": "/srv"
}To create a new user, it's under settings -> User Management, and add a user and password accordingly, and give appropriate permission. The scope is where the root folder where the user have access to, since the docker data folder is bound at /srv/docker and /srv is defined as root folder in config, the folder name to put in scopes would be /docker. Only one scope is allowed.

It is also possible to add rules to prevent user access of files within a scope. Under rules, enter the path that is relative to the scope, for example /docker/minecraft/config would be /config

Personalization
Enable dark theme - Setting -> Global Settings -> Branding
- also change the branding directory path to /branding which is bind mount in docker
Under the branding folder, create a file custom.csswhich is used for css customization. Then create a folder img and place logo.svg in it for custom icon. The icon is the same as egow entertainment and stored in OliveTin icon PSD file. Under the folder img, create a folder icons and use favicon generator site to create an icon archive and put all the content of that archive in the icons folder, the result should look like this.

Reverse Proxy/Homepage
Reverse proxy is normal procedure using NPM. To add bookmark to a file location, use browser/homepages bookmark function.